

How To Use an EmberForge for Live Ember Cooking (Step-by-Step Guide)

How To Use an EmberForge for Live Ember Cooking (Step-by-Step Guide)
Alright, let’s get into this.
If you want to cook with live embers instead of chasing a fire all day, this is the system.
In this article, I’m going to walk you through what the EmberForge is, how it works, and how to actually run it to produce a steady, usable ember supply for your cook.
This is not a grill.
It’s not a burn barrel.
It’s an ember production tool.
And once you understand how to run it, everything about your cook gets calmer and more predictable.
Watch the Full Video
What the EmberForge Actually Does

The entire goal is simple:
Separate flame from cooking.
When you cook with flame:
- You get spikes
- You chase temperature
- You deal with flare-ups
When you cook with embers:
- Heat becomes steady
- The cook becomes predictable
- The pit becomes easier to run
What we’re doing here is producing controlled embers outside the cooker, then feeding those embers into the pit where we want heat.
Why Ember Cooking Changes Everything

When you’re running a system like this, you’re not managing fire anymore.
You’re managing heat content.
That’s a big shift.
No flames under the meat. Just glowing embers.
That means:
- No sudden BTU spikes
- No airflow surges
- No burned surfaces from flame contact
Instead, you get steady radiant heat rising from a controlled coal bed.
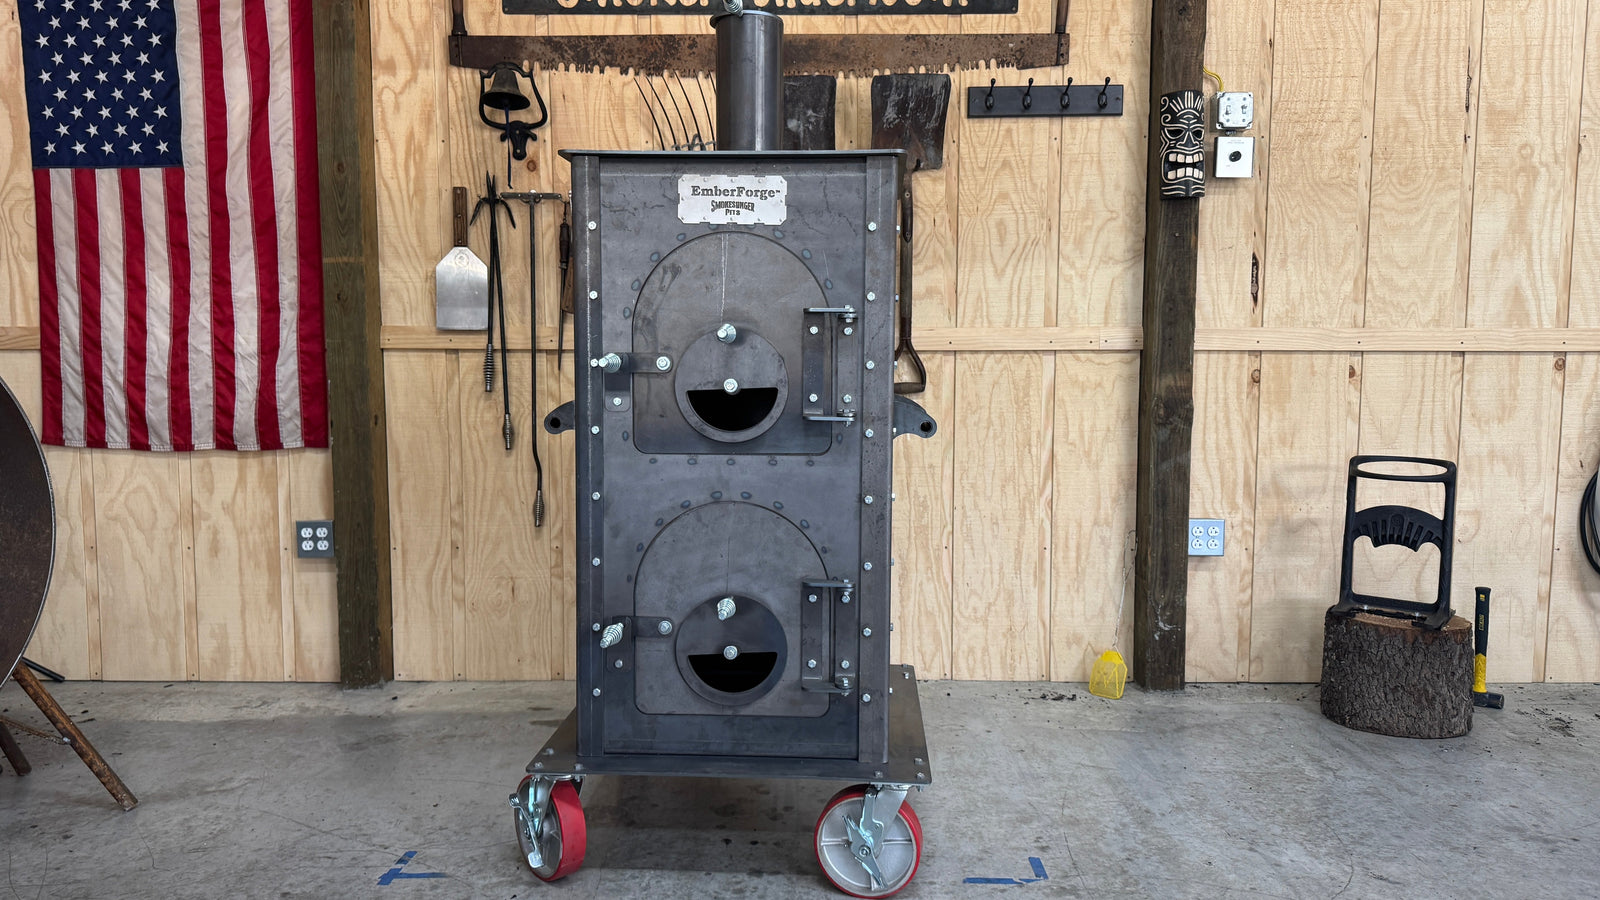
How the EmberForge Is Built to Work

The EmberForge uses a simple but powerful layout:
- Wood burns in the top chamber
- Embers fall into the bottom chamber
- Airflow is controlled to slow consumption
The goal is not to build a massive fire.
The goal is:
Convert wood into usable embers at a steady pace.
How To Light the EmberForge

1. Build a Fire Structure
- Start with kindling or small splits
- Build upward into a log cabin structure
- Focus on getting the top section burning
2. Light for Ignition (Not Explosion)
- Use a torch or starter
- Light the base and sides
- Let the fire climb upward
3. Open Airflow Fully
- Stack open
- Bottom air open
- Top door cracked
You want strong upward draw and flames in the top chamber.
What Good Ember Production Looks Like

This is where people get it wrong.
You are not looking for:
- Flames
- Black smoke
- Half-burned wood
You are looking for:
- Fully developed embers
- Glowing coals
- No active flame
That is fuel ready for your pit.
How To Feed Embers Into Your Pit

Once you have a steady ember supply:
- Use a flat shovel for control
- Place embers where heat is needed
- Spread or concentrate based on the cook
The key:
You’re not feeding a fire—you’re placing heat.
How To Maintain Ember Rhythm

This is the part that makes everything work.
You don’t run this reactively. You run it on rhythm.
- Check every ~30 minutes
- Light rake of coal bed
- Add wood as needed
- Sprinkle embers where needed
Consistency matters more than intensity.
Common Mistakes to Avoid
- Overloading the fire → causes flame spikes
- Not allowing conversion time → leads to poor embers
- Feeding flames into the pit → creates unstable heat
Why This System Works
The EmberForge paired with a Smokeslinger creates a complete system:
- EmberForge → controls fuel
- Smokeslinger → controls heat
Together, you get:
- No chasing temperature
- No flare-ups
- More predictable results
FAQ
What is an EmberForge used for?
An EmberForge is used to produce controlled embers for cooking, allowing you to separate flame from your pit and manage heat more consistently.
Why cook with embers instead of flame?
Embers provide steady radiant heat, while flame causes temperature spikes and uneven cooking.
How long does it take to produce embers?
Typically 1 to 1.5 hours to build a steady ember supply for cooking.
Can you use an EmberForge with any smoker?
Yes, it works with any pit where you can manually place embers for heat control.
Final Thoughts
The EmberForge is not about more fire.
It’s about control.
Once you understand ember production and learn to run a steady rhythm, your cook becomes easier, calmer, and more repeatable.
👉 Get more information about EmberForge and Smokeslinger
Keep your smoke thin and blue.
We’ll see you on the flip side.
Leave a comment
Comments will be approved before showing up.
Also in News

Smokeslinger Owner Spotlight: From Pellet Grill to Easy Direct Heat Cooking
Luc Barrette shares what it’s really like switching from a pellet grill to a Smokeslinger. No complicated process—just steady fire management, simple adjustments, and real results.


Smokeslinger Full Size Review: 9 Powerful Reasons This Direct-Heat Grill Beats Expectations
BBQ influencer Allan Kiezel (FattyButts BBQ) uncrates, sets up, and seasons his Full Size Smokeslinger with Planchas. Here’s my take on his honest feedback — from bar grates and baffle plates to airflow and reverse flow smoker setups — plus practical tips to get yours dialed on day one.

Can Direct Heat Smokers Match Offset Brisket Results?
Can direct heat smokers match offset brisket results? Shown on our Full Size Smokeslinger! Easy steps for juicy brisket.
Explore More BBQ Tips
Loved this post? Our blog is packed with Texas BBQ techniques, from mastering your offset smoker to perfecting direct heat grilling. Join the Smokeslinger community and elevate your BBQ with our Texas-made pits.
Get a Quote